Welcome to RepMove! We’re excited you’ve joined us. This guide is meant to help you get comfortable with our app so you can see success as quickly as possible.
Let’s get started.
Here are some short videos that will help you get into RepMove:

- Creating a New Account on the App
- Editing Address for an Account
- Route Note activity
- Rescheduling planned stops
- ICS Calendar Integration
How to Create an Account
- Open your RepMove app and click the top right plus (+) icon.

- Select either customer or prospect and fill in the fields. You can also tap the icon to the top right of the screen to automatically scan a business card to populate the fields.


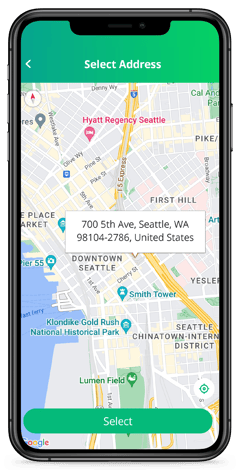
- You can add an address directly from the map by tapping the map pin in the Search Address bar and selecting the location of the Account you want to add.

You can learn how to add your accounts on our Web-based Dashboard here.
Import your Data
It's best to import your data through our web-based dashboard on a desktop/laptop.
You can use your own spreadsheet, or you can use our spreadsheet template to upload your data.
First, sign in to your account.
- Go to the Accounts tab on the left navigation.

- Click the green plus (+) icon in the top right and select Import Accounts.


- Select the Owner of the Data, and choose if you want to import as customers, prospects, or satellites. Use the appropriate document format, then click Select File to Upload.

- Upload your spreadsheet and map your data to the corresponding fields.

- Click Save.

Depending on how many accounts you are importing, this process can take a few minutes.
If incorrect data is present (such as a bad address or the absence of a required field), a report will appear above your data, explaining what rows on your spreadsheet need to be fixed.
Let's Start your first day
There are generally two ways to work your sales day using RepMove.
Option One
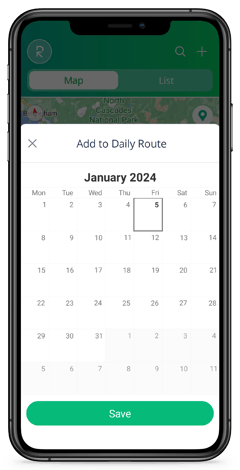
- On your Home tab use the map to find the Accounts you want to add to your daily route and tap Add to Daily Route.

- Select the date for your route and hit Save.
- Once you've selected all the accounts and prospects for the day, tap the green Daily Route button on the Home tab.

- You can tap Optimize, which will reorganize your stops for the most time-effective route, and add tasks to your visits. Then tap Go!

- Slide your start location card to the left and head to your first stop. Add notes to complete your stops as you navigate through your day.

Option Two
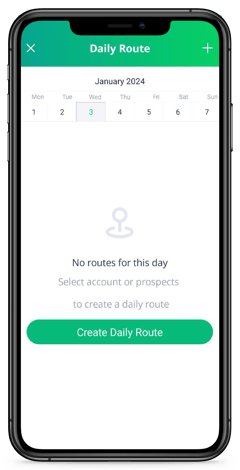
- On your Home tab, tap the green Daily Route button over the map.
- Tap Create Daily Route.
- Add your starting and ending locations represented by green and red flags respectively and then add the accounts you'd like to add by tapping the checkbox.

- Hit the checkmark in the top right corner when you're done.

- Tap Optimize to create the most time-effective route, add tasks to your visits, and tap Go!

- Slide your start location card to the left and head to your first stop. Add Notes to complete your stops as you navigate through your day.
RepMove's Sales Pro plan provides you with more advanced features like the ability to draw and customize routes and save your planned routes as recurring routes.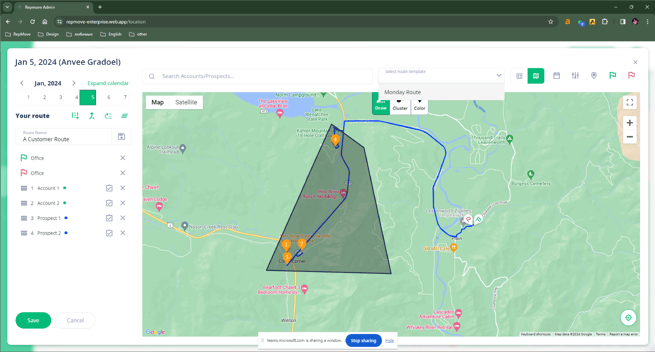
If you need personalized assistance with setting up and getting ready, our customer support team is always happy to help, just set up a call with us!